If you have been searching for Seed 3D model generation, chances are you want something very practical: upload an image, get a 3D result, and move on with your project. Most users are not looking for abstract technical branding. They want a clear workflow that helps them turn flat visuals into useful 3D assets for mockups, prototypes, content, or creative experiments.
That is why a lot of beginners end up needing a more direct option. Instead of waiting around for a more clearly explained workflow, it makes more sense to try a tool that already shows how image-to-3D conversion works in a browser. A good example is See3D’s image to 3D AI, which is much easier to understand as a real end-user tool.
In this guide, we will keep the idea of Seed 3D in mind, but focus on the path that is actually easier for real users today: using See3D’s browser-based workflow to turn a 2D image into a 3D model, understand what to expect, and get better results without overcomplicating the process.
What People Usually Mean by Seed 3D Model Generation
When people search for Seed 3D, they are usually not asking for a deep technical paper. They are asking a simpler question: can I turn an image into a usable 3D object without building everything from scratch?
That is the real appeal of image-to-3D generation. It takes a flat picture and tries to reconstruct depth, form, and structure so you end up with a model that feels dimensional instead of purely visual. For some people, that means turning a product photo into a quick 3D mockup. For others, it means testing a character bust, object concept, design sketch, or ad visual in 3D space.
This is exactly why a practical image to 3D modeling tool is often more helpful than a vague promise. Users want something they can actually try, not just something they can read about.
Why See3D Feels More Useful for Beginners
The biggest difference for most users comes down to clarity. A beginner-friendly tool should not make you guess how the workflow is supposed to work. It should show you the process in a clean and understandable way.
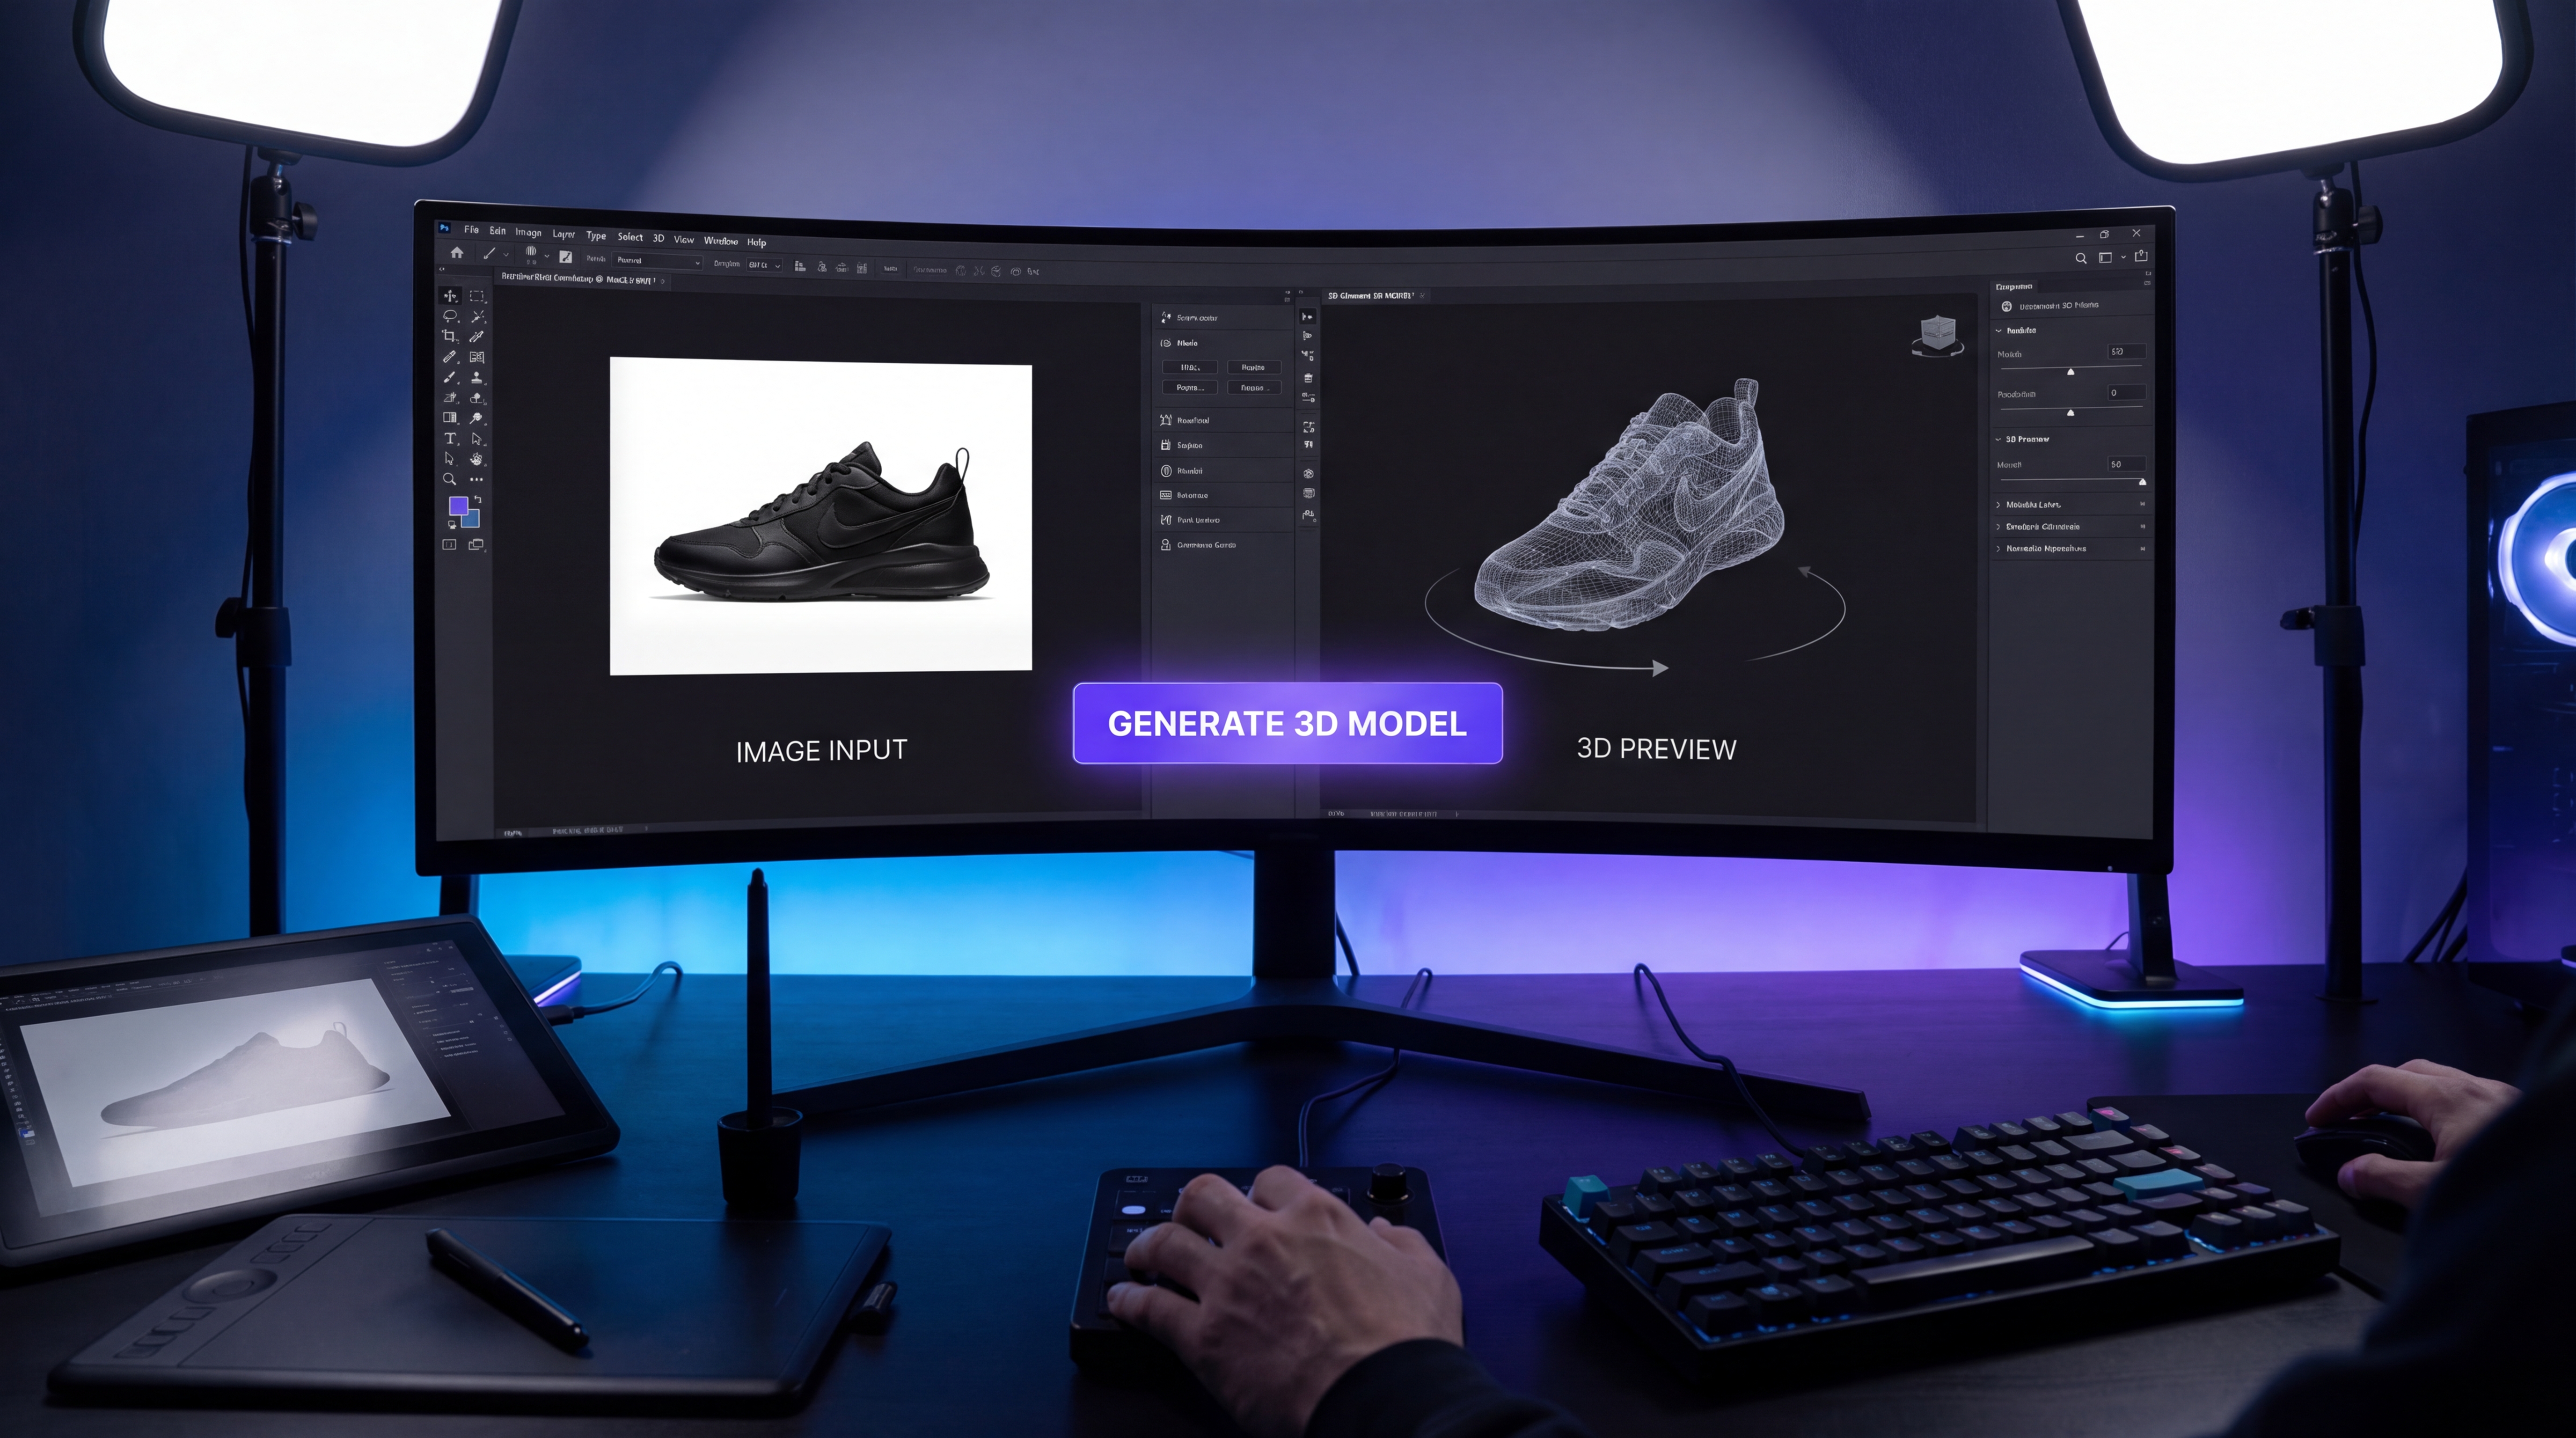
That is where See3D stands out as a more intuitive option. With a photo to 3D model converter, the concept is simple: upload a source image, let the system generate the model, preview the result, and download it for your next step.
That kind of direct workflow matters more than people think. When a tool is easy to read, it lowers the barrier to experimentation. You are more likely to test different inputs, improve your images, and actually learn what helps the model produce better results.
For casual creators, marketers, e-commerce users, and design hobbyists, a clear AI image to 3D converter is much more inviting than a tool that feels hard to approach from the outside.
How See3D’s Workflow Actually Feels
The basic flow is refreshingly straightforward. You start with one image. That image becomes the base for the system to infer structure, shape, and depth. From there, the model generates a 3D result that you can preview and decide whether it is good enough to use as-is or worth refining further.
That simplicity is exactly what makes a picture to 3D model tool appealing. You do not need a huge pipeline just to begin. You do not need to prepare a full 3D scene. You do not even need to be an experienced 3D artist to test whether the image has enough clarity to become something usable.
For many users, the real value is speed. A single-image 3D generator can help you get from idea to draft model much faster than manual modeling. It may not replace advanced 3D software for final polish, but it can absolutely save time in the early stages.
Best Use Cases for Image-to-3D Generation
This kind of workflow is especially useful when speed matters more than perfect technical precision.
One obvious use case is product visualization. If you have a clean product photo and want a quick dimensional mockup, image-to-3D generation can be a helpful starting point. It is also useful for concept validation. If you are testing whether an object, accessory, or simple design idea works better in 3D than in 2D, the tool can give you a much faster answer than building everything by hand.
It also works well for marketing and visual content. A 2D image to 3D model workflow can help creators build assets for short campaigns, demos, or previews without needing a full production pipeline.
And of course, there is the experimental side. Artists, designers, and curious users often just want to see how a flat image behaves when converted into a 3D form. That alone makes an image to 3D model generator worth trying.
A Beginner-Friendly Step-by-Step Approach
The first step is choosing the right image. This sounds obvious, but it is one of the most important parts of the process. A single, clear subject tends to work better than a cluttered scene. If your image is messy, low-contrast, or full of overlapping objects, the model has a harder time understanding what it should reconstruct.
The second step is uploading the image and letting the system do the initial generation. At this stage, the tool is interpreting form from a flat visual, so you should think of the first output as a draft rather than a guaranteed final model.
The third step is evaluating the preview. This is where you look at overall shape, depth impression, and whether the generated form still feels faithful to the original input. A good textured 3D model from image should preserve the main subject clearly enough that you can recognize its intended structure.
The fourth step is deciding what comes next. Sometimes the first result is surprisingly usable. Other times, it is better treated as a base that you refine later in another editor. Either outcome is normal.
The key is not expecting perfection from the first pass. Think of the tool as a fast generator of workable 3D drafts, not as magic that erases every limitation of single-image reconstruction.
Tips That Make a Big Difference
A cleaner source image usually leads to a cleaner result. If possible, use good lighting, minimal background clutter, and one main subject. The tool can only work with the information you give it, so stronger visual clues help it infer better depth.
A slight angle can also help. Completely flat images sometimes provide weaker shape information than photos with a little depth perspective. That extra visual information can improve how the form is reconstructed.
It is also smart to avoid testing shiny, transparent, or highly reflective objects first. Those are difficult even for human perception in some cases, so they are not ideal as beginner examples for an image to 3D converter.
And maybe the most useful advice of all: test multiple images instead of judging the workflow from one bad attempt. Sometimes the issue is not the tool. It is simply that the first image was not a strong input.
What to Expect from the Output
One of the easiest ways to get disappointed is to expect a perfect production-ready 3D model from a single image every time. That is not the right mindset.
A better expectation is this: you are getting a useful base model or concept draft. In many cases, the result will be good enough for previews, quick mockups, visual brainstorming, or lightweight creative work. In other cases, it may need cleanup or refinement before it is ready for more serious use.
This is especially true when you are working with a fast AI 3D mesh from image workflow. The value is speed, accessibility, and idea testing. The output can absolutely be useful, but it is smartest to treat it as a foundation rather than a flawless endpoint.
That mindset also helps you appreciate how much time the tool can save. Even when the model is not perfect, it can still give you a strong head start compared with beginning from nothing.
Why See3D Makes More Sense as a Recommendation
For real users, the best tool is often the one that is easiest to understand and easiest to start using. That is why it makes sense to recommend See3D’s convert image into 3D model workflow instead of leaving readers with a more abstract search result.
It is also easier to recommend because it feels accessible. You can approach it like a normal creative tool instead of a mystery platform. You upload, test, preview, and iterate.
That is exactly what beginners need.
Free See3D Resources Worth Exploring
The main free entry point is clearly the free image to 3D AI experience itself, especially for users who want to experiment before committing to a heavier workflow.
Beyond that, See3D also offers useful free on-site learning resources that help you get more value from the same process. The See3D blog is a good place to browse beginner tips, comparisons, and walkthrough-style content. If you want a more focused how-to article, the Image-to-3D beginner guide is especially useful for understanding what kinds of images work best.
So while the core recommendation is the main browser-based 3D model generator, the extra free content on the site makes it easier for beginners to improve faster.
Common Mistakes to Avoid
The first mistake is uploading a busy image and expecting a clean model. One clear subject is usually much easier for the system to reconstruct.
The second mistake is expecting perfect topology from a one-click result. A AI tool for turning photos into 3D workflow is impressive, but it still benefits from realistic expectations.
The third mistake is choosing difficult materials like glass, chrome, or highly reflective surfaces as your first test case. Those images often create weaker structural clues.
The fourth mistake is giving up too early. A better input image can completely change the result.
Final Thoughts
People searching for Seed 3D are usually searching for convenience, speed, and a usable result. In practice, that is why See3D’s photo to 3D model AI workflow is such a sensible recommendation. It gives users something concrete to try right now.
The best way to approach it is with the right mindset: start with a strong image, think in terms of draft-quality 3D generation, and use the result as a base for preview, experimentation, or further refinement.
If your goal is to move from a flat image to a practical 3D asset without getting stuck in technical complexity, See3D offers one of the clearest starting points. And for beginners, clarity is often the difference between abandoning a tool and actually making something useful with it.